Posted on 3 Comments

Outdoor Hour Challenge: Table Top Garden

Tabletop-Garden-Nature-Study-@handbookofnaturestudy.blogspot.com

Outdoor Hour Challenge:
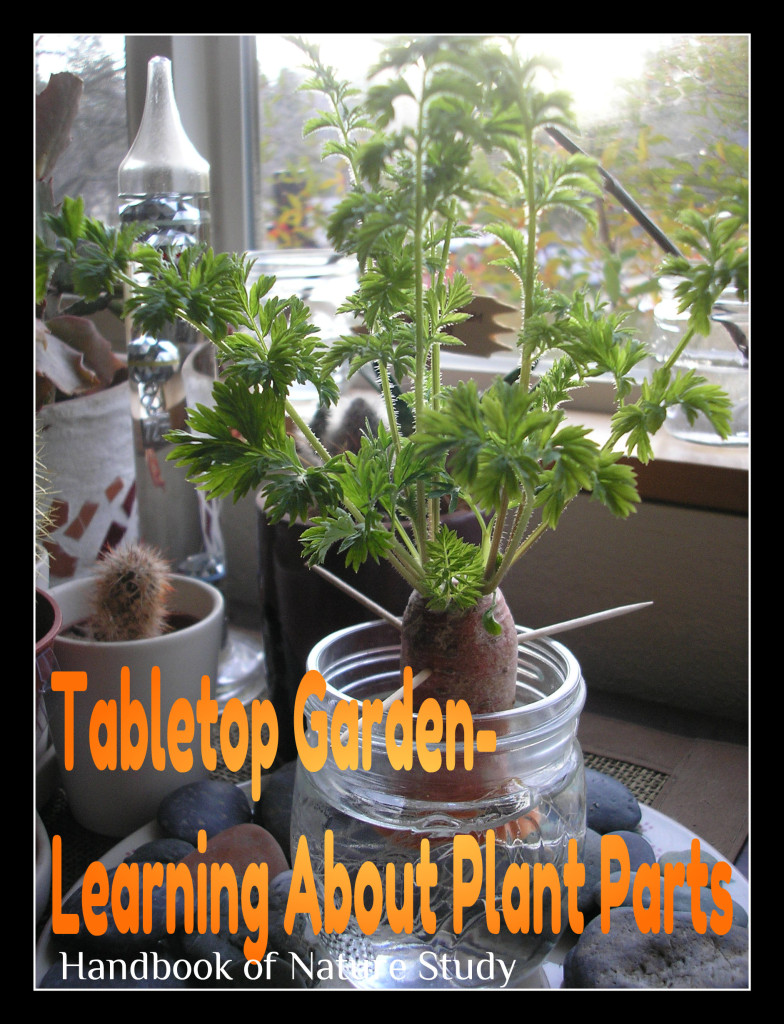
A fun way to learn about plant parts is to grow a table top garden with a few root vegetables. This week I challenge you to make a table top garden with your children. Keep it simple and start with one veggie and see the way it grows roots and stem and leaves. This is an easy project for any age. 

Instructions on Hearts and Trees: Indoor Nature Study Idea: Table Top Garden 
These instructions include a free downloadable notebooking page to go along with your table top garden.


Add your table top garden to your nature table as an on-going nature study experience.

Activity Suggestion: Create a Garden Flowers Nature Table
 
Free Printable Nature Table- Garden Flowers

Getting Started Suggestion:
If you already own the Getting Started ebook, complete Outdoor Hour Challenge #3. Use this challenge to help you draw your table top garden as you make your observations. Use the notebooking page in the ebook or the free one noted in the challenge above. 

Blog Logo 1

Posted on 3 Comments

Moss on Our Nature Table and Up-Close

What a delightful addition to our nature table! Moss in a pot adds some color and texture to our little growing area of the nature table where we also have several varieties of cactus growing. The light seems just about right here for the moss and so far we have watered it once a week and it is still going strong.

The moss on the plate above was the specimen we brought inside to examine as part of the Moss Challenge from last week. We viewed it closely with our eyes, magnifying lens, and camera lens. There really is a lot to see and the parts of the moss are really interesting.

After viewing, I took a small pot and filled it with some regular garden soil and then placed our specimen on the top. I watered it well from the top and then pressed it firmly onto the soil. I did a little research and it said that moss really does like to be watered from the bottom so when I need to water it I place it in a small bowl of water and let it sit until the whole thing is moist.

Moss and capsules up close @handbookofnaturestudy.blogspot.comHere are few images that we took with our camera…really showing the capsules and the stems.

Moss up close @handbookofnaturestudy.blogspot.com

Amazing structure and no wonder it is soft and enjoyable to the touch!

Our front yard is a great habitat for moss since we pulled out the lawn. The cracks in the pavers and the area below the retaining wall have moss that adds such a great feel to the yard. We did not plan on the moss but it just invited itself to grow in the cracks and crannies.

Moss-on-Rocks-@handbookofnaturestudy.blogspot.com

The big rocks in the foreground were bright green with moss a month or so ago but since we have had warmer temperatures and drier days the moss has turned sort of brown. I know with the next rain it will green up again so I will enjoy that when it happens. You can see our Lamb’s ear plant here in this image…one of my favorite low water plants in our front yard….I know it spreads but with the big rocks right there and the retaining wall behind, it can’t go too far.

So there you go…our continuing moss study! Don’t forget there is a free printable in the Moss and Lichen Challenge that you can use to record your own moss study.


How about your family? Have you found some moss to explore with all your senses?

Posted on 4 Comments

Outdoor Hour Challenge – Bird Study Grid


We are staring a month long focus on birds using the Handbook of Nature Study and other resources found here on my blog and in each Friday’s post. Make sure you have subscribed to this blog so you will receive the monthly newsletter download link for additional bird study encouragement and special discounts on ebooks and other products.  

Outdoor Hour Challenge:
For our first bird related challenge, let’s all print out our Bird Study Grids from the newsletter. This month they are a little different than in previous months. I have given you two simple grids that you all can use wherever you live and at whatever time of year you want to study birds. There are also two smaller tally sheets you can print out for your nature journal to record bird colors and bird parts you observe. Print and cut any or all of the grids this month and have some fun while taking your Outdoor Hour Challenge time either outdoors looking for birds or from you window if you need to.  


Printable Activity: Handbook of Nature Study Nature Table Ideas Birds
Use the suggestions on this free printable to build or add to your nature table. There are many suggestions that have hyperlinks so make sure to check those out for additional ideas and resources. Send me a photo of your nature table and it may be included in the next newsletter!

Getting Started Suggestion:
If you already own the Getting Started ebook, complete Outdoor Hour Challenge #4.  Use your outdoor time to talk about your new focus for the month on birds and all the different ways you can learn about birds. Spend a few minutes listening for birds, looking for signs of birds, and then completing the accompanying notebook page in the ebook or an entry in your own nature journal. 

Blog Logo 1


Handbook of Nature Study Ultimate Naturalist Library

Posted on 10 Comments

Top 5 Ways to Display Rock Collections

Now that we are all in the midst of collecting rocks for our rock collections, I want to share my Top 5 Ways to Display Rock Collections. There are ways of attractively displaying your rocks and still leave them available for inspection and closer observation. Most of the methods do not require big investments of money since you can recycle containers and other materials needed. I like keeping our rocks out in the open because it does encourage our children to look at them and I have found visitors to our how stop to take a look and ask about them as well. This gives us a chance to share what we know about our rocks…love that kind of learning and sharing.

Jar – We love this simple way of collecting rocks when we are traveling. I simply bring along a container or two with lids (look for them at your local dollar store). I prefer plastic to glass for obvious reasons. If you wanted to you would collect the rocks in the plastic jars and then when you got home you could transfer them to pretty glass containers. I use a Sharpie marker to label the top for future reference.

Tray – Placing rocks on a tray on our nature table makes it super easy to view them, study them, and keep them organized. I have found that using a tray is much easier if you place a cloth or placemat on top before adding your rocks. This keeps the rocks from rattling around and sliding onto the floor. You can rotate the rocks on the tray to spark interest. I also add a magnifying lens or loupe to the tray so we can take a closer look at our rocks.

Window Sill – This was our method of displaying rocks when we wanted them handy for study. My sons would gather the rocks from our collections and then place them all in a line on the windowsill. The secret advantage to this method of displaying rocks is that you are limited to the space on the window sill. If you want to add a rock and the sill is full, you must remove a rock.

Vase – Many of the rocks we collect are found at the river’s edge or at the seashore. They look so very pretty when they are wet, showing the variations in color and composition. By the time we get them home, they are dry and dull and sometimes I even wonder what attracted us to a certain rock. But, I have found that if you get them wet again your see the beauty shine through. Using the rocks in the bottom of a clear glass vase, filling it with water, and then adding a splash of flowers is one of my favorite ways to bring those rocks alive again.

Shelf – In the past we have dedicated a shelf to our rock collections. The collections were either contained in nice specimen boxes or in other recycled boxes with labels. I found this the least attractive of the methods of displaying rocks because it does not really let you see the rocks easily. But, if you have younger ones who collect lots of rocks, you may for a time, need to display your rock collections in this way. I also have a shelf that has a collection of very unattractive shoe boxes with rocks stacked inside….not shown in the images above…not a preferred method.

This month’s nature study theme continues to be rocks and minerals. You can subscribe to this blog and receive your Handbook of Nature Study Newsletter with suggested rock activities, printables, and articles in your email inbox or in your Google Reader. The link to download the newsletter is in every entry for the whole month. You also may wish to read this week’s challenge: Start a Rock Collection with a free printable to make your own rock treasure box. 
 

Amazon.com Widgets

Posted on 3 Comments

Autumn Season: Cottonwood Tree


Tree study brings such a greater understanding of the cycles of life in our own backyards as we watch the changes, growth, and means of reproducing in each tree we focus on. We learn more about the animals and other creatures that live in the tree, on the tree, and use the tree for shelter or food. It gives us a way to measure time and to anticipate the coming changes.

Learning one tree at a time is an easy way to ease into nature study if you haven’t done so yet. Let your child pick a tree in your yard or neighborhood. Even if you live in a big city you can find a tree that you walk past on a regular basis, perhaps at the library, post office, or grocery store. You can make it a casual study or more in-depth and even just finding out the name of a tree can be enough to get you started.

Here are the trees we have done a formal study of since starting this project:
Oak Tree 2007-2008
Sweet Gum 2008-2009
Tulip Tree 2010-2011
Birch Tree 2011-2012

Now we are continuing our study of the Cottonwood tree that we started back in July 2012: For the Love of Trees.  We do not have a cottonwood in our yard but there are a few around town that we have noticed. We picked a particular tree back in July and we decided to revisit it now that the season has changed.

Autumn 2012 – Cottonwood


Our cottonwood has just begun to change color and drop its leaves. I drive past this tree every week or so and I think it will be fun for us to watch and see when it looses all its leaves as the season marches on.


Here are a few of the leaves and their color. As a sidenote, now that I know what a cottonwood tree looks like and the shape of the leaves, I am seeing more and more of them as we go about our travels in our area. I can also tell by the way the leaves blow and shimmer on the trees.


We didn’t see any birds or other animals in our tree. There wasn’t any “cotton” around this time to observe. I did collect a few leaves to press and a few to add to our nature table which is getting quite crowded. I think I need to sort through and see if I can take off a few things.


Now we will be anxious to complete our study for the winter season and see what changes there are in our cottonwood. You are always welcome to join in with a year-long tree study of your own: See this entry for some ideas on how to get started: For the Love of Trees or this Four Seasons Tree Photo Project.

Please visit and share with us at the CM blog carnival! We'd love to have you!
I am submitting this entry to the Charlotte Mason Blog Carnival and if you have any entries you would like to submit, you can send them to this email address: charlottemasonblogs@gmail.com. The official blog carnival site is not working so you will need to send them directly to this email.

Posted on 7 Comments

Forcing Spring Buds – Leaves and Blooms Update

Forsythia blossom (1)

Have you tried forcing twigs to blossom? It is the perfect easy late winter nature study project for any family.

This is an activity that we enjoy every year.  In February, we cut and bring in forsythia twigs to force the buds to bloom indoors. This year we added some additional twigs and buds to our collection and they are starting to unfold. The project is so easy and it is not too late to try your hand at some twigs from your yard.

Birch leaf

This birch leaf is from our Twig Study earlier this winter. It has little spring green leaves opening…love the texture and the shape.

Buckeye leaf and bud (2)
We also collected twigs from one of our hiking trails and even though they all looked a little different at the beginning, we realized now that they are opening that they are all from buckeye trees.

Buckeye leaf and bud (1)
It is such a simple project with some fascinating results. We cut the twig, placed it in a jar of water, and then set it in the window sill. After that, you just need to be patient.

We have had such amazing results that we are going to cut some more twigs today. I think the plum tree would be a great candidate for this project. I will post our results when we see some blossoms. 🙂

Tabletop Carrot

So did you start a tabletop garden of your own? We have been watching our carrot first grow roots and now it is putting lots of energy into making leaves. This is another simple and fun project that your family can try at any time.

Posted on 5 Comments

Trip to the Nature Center: Birds, Butterflies, and a Sundial Bridge

So yesterday was our big day trip to Turtle Bay. The weather was perfect which was a big relief. The city of Redding is usually scorching hot this time of year but there were a few high clouds in the morning to keep the temperatures down.

We started off with the outside exhibits at the nature center just in case it warmed up and the aviary was first on the list. What a racket these birds can make! You are given a little stick with some seeds on it to attract the birds down to eye level. This was a great way to spend extended time close-up to these colorful birds.


These Rosellas preferred to sick up high and watch us instead.


This pair of cockatiels posed for me and they never did come down to snack on the seeds.


After the aviary, we visited the butterfly house. We didn’t see too many butterflies this time but this Julia on some sedum was the prettiest one that I captured in a photo.

After lunch we went outside to explore the botanical gardens. What a display of plantings that will grow in our climate! I did not realize that this place had so much information and now I need to go back when I am fresh and the sun is not so hot. We became members of the nature center so we can get in free for a whole year and this will make it easier to go back just to look at the gardens and get some ideas for my yard.


We are going to be pulling up our lawn and replanting with drought-resistant plantings and the display at this botanical garden will help us pick things that will flourish and be beautiful without so much water.


This is the famous Sundial Bridge which doesn’t look much like a bridge from this photo because I took it from the gardens. Believe me, it is a very large bridge over the Sacramento River that connects the nature center with the botanical garden. Follow the link above to see the whole thing in a photo.


The bridge really is a big sundial. I took this photo of the shadow at 12:47 and you can see on the rock that it says 1:00….what a great way to teach about the sun and telling time.


One more thing that I loved about this nature center is the way things are so open to explore. This shelf is just what I want in my living room to display all our collections and nature stuff. I might have to have my son take a look at it and see if he can design something similar to fit my space.

It was a very long day with a long drive to get there and back but all of us agreed that it was a fantastic place. We all found something to be excited about and interested in. What more can you ask for?