Posted on 3 Comments

OHC More Nature Study Book 2 – Moon and Moon Names

Our Best Moon Shot of the Night 1 31 10  
More Nature Study Book #2 
Moon and Moon Names  

Inside Preparation Work:

  1. Read in the Handbook of Nature Study pages 855-859 (Lesson 232). Read for your own information only because this week we are just going to focus on enjoying the moon and learning some of the history of the full moon names.
  2. Read this page on Full Moon Names and see what March’s moon name means.
  3. If you have a blog or website, you can add a lunar phase widget to keep up to date.
  4. YouTube video: Moon phases (kid friendly)

Outdoor Hour Time:

  1. Spend part of your Outdoor Hour time in the evenings looking at the moon. (Full Moon March 8, 2012) Have your child use words to describe what they see in the winter sky. If you have binoculars, make sure to bring those out with you and take turns looking at the moon.
  2. As an alternative, bundle up and go outdoors for this challenge in the evening when it is dark. Have a flashlight for each person as you walk to a safe, predetermined spot (even within your backyard). Turn off the flashlight and allow time for your eyes to adjust. Make some observations. This might be a great activity to do when there is a full moon and then again when there is a new moon.
  3. Advanced Study: Keep a record of your moon observations. The Handbook of Nature Study suggests, “Have the pupils observe the moon as often as possible for a month, beginning with the full moon.”

Follow-Up Activities:

  1. Talk about your experiences outdoors at night. Record your moon and nighttime observations. You can sketch the full moon with colored pencils or watercolors. View these moon nature journals as examples to get started: Just Before the Full Moon, Waning Sturgeon Moon, Full Worm Moon. These should give your child an idea of how to show the moon and a setting.
  2.  Ebook Users: After viewing the moon or looking at the Mood Words Images page included in the ebook, complete the Moon Words notebook page. Use your moon words and observations to make up a new full moon name. Be sure to record you name for this full moon on the notebook page or in your nature journal.
  3. Advanced Study: Keep a moon journal for a complete lunar cycle (full moon to full moon). Make as many moon sketches as you can during this month to document the lunar cycle. Record your observations in your nature journal. Ebook users: Use the Moon Journal notebook page from the ebook.

Additional Links: 

You can see how our family completed this challenge here in this entry:
Magnets, Compass, and Moon Names.

More Nature Study Winter Wonder

Ultimate Ebook Library @handbookofnaturestudy

Posted on 2 Comments

OHC More Nature Study – Magnets and Compass

Sunset with clouds and pines  
More Nature Study Book #2 
Magnets and Compass 

“The first ideas to learn are that the sun rises in the east and sets in the west. Just by knowing this he’ll be able to tell in which direction nearby streets and buildings are from his house or town….Have him stand so that east is towards his right where the sun rises and west is towards his left, where the sun sets. Everything straight in front of him is north, everything behind him is south.” Charlotte Mason, volume 1 page 75

Inside Preparation Work:

  1. Read in the Handbook of Nature Study pages 776-779 (Lesson 219 on the magnet). Use a highlighter or underline sections that you would like to share with your children. Suggested magnet activities: #1, 2, 3, 5, 6, and 7.
  2. As a supplement to the lesson on the magnet, introduce your child to a compass. Start by teaching your child the four cardinal directions: North, East, South, and West. Show them that the compass will always point to magnetic north. Now explain that south will be in the opposite direction, east to the right, and west to the left. Suggested activities from Lesson 219: #12 and #13.
  3. Watch these videos: How to Hold a Compass and Bill Nye on the Earth’s Magnetism.
  4.  Advanced suggestion: Make your own compass.

Outdoor Hour Time:

  1. Spend your Outdoor Hour time in your own backyard or neighborhood. Take your magnet and compass outside with you. Let your child use the magnet to find things that are magnetic in your yard. (Make sure to keep magnets away from electronics.)
  2. Take your compass outdoors and have your child find the four cardinal directions. Find landmarks for each direction. For example: north is the pine tree across the road from your house, south is the telephone pole on the next street, east is the neighbor’s flag pole, west is the mailbox.
  3. Advanced suggestion: Observe the sunset to see the exact direction it sets during the winter. Make observations over the next month, record the results, and see how the direction changes over time. Use a compass to record the exact direction in degrees. Ebook users: Use the Sunset Observation notebook page to record your results and conclusions.

 Follow-Up Activity:

  1. Take a few minutes to ask your child what they learned about magnets and compasses. They may be satisfied with this challenge at this point and the best way to follow up is to use the skills you learned in the days to come. Use the vocabulary you learned (magnetic, north, south, east, west) as you complete future nature study or outdoor activities.
  2. Your child may like to complete a notebook page recording their magnet and compass observations on notebook page or they could record their results in a nature journal. Optional: Use this Points of a Compass (Homeschool Share) activity for younger students if you wish.
  3. Advanced follow-up: Use your compass skills to determine the orientation of your house. Make a map of your neighborhood and include a compass rose. (You can learn more about a compass rose HERE.) Use this information in the future by recognizing wind direction as you observe the weather. Wind is named for the direction it is coming from and not where it is blowing to. (Example: North winds are blowing from the north.)
  4. Advanced follow-up: Map and Compass Basics-Azimuth and Navigation with a Compass.
  5. Advanced follow-up: Have you read about Letterboxing or Geocaching? Both of these family activities can be fun ways to get outdoors and use your compass and map reading skills.

You can see how our family completed this challenge here in this entry:
Magnets, Compass, and Moon Names.

More Nature Study Winter Wonder

Ultimate Ebook Library @handbookofnaturestudy

Save

Save

Posted on 1 Comment

Gall Dwelling Insects – Our Winter Study

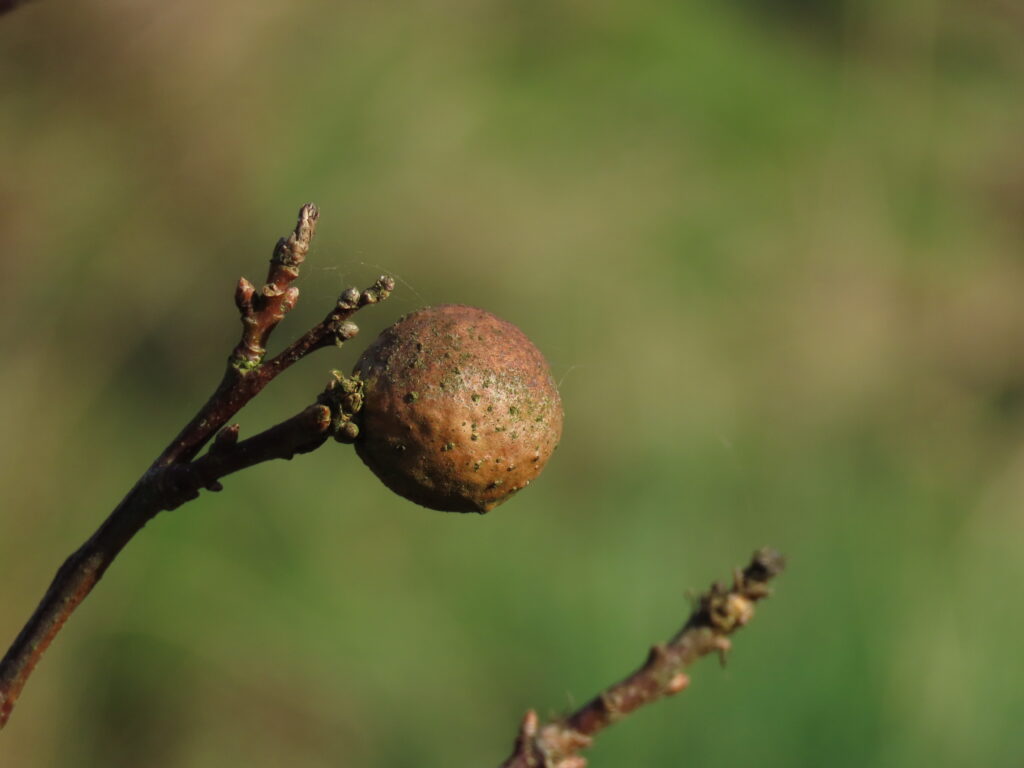
Our gall study has been going on for several months now and we have gathered quite a few different kinds of galls during our hikes. Some of the galls are really small but once we know what we are looking for we can look for the signs on the oaks. During the winter, the galls are more noticeable because there are far fewer leaves to deal with. Our local forest is a mix of evergreen and deciduous oaks so we still have plenty of leaves to check but not as many as the middle of summer.

I think the key to finding galls is to know what you are looking for. Check the links in the original challenge if you have any trouble getting started.

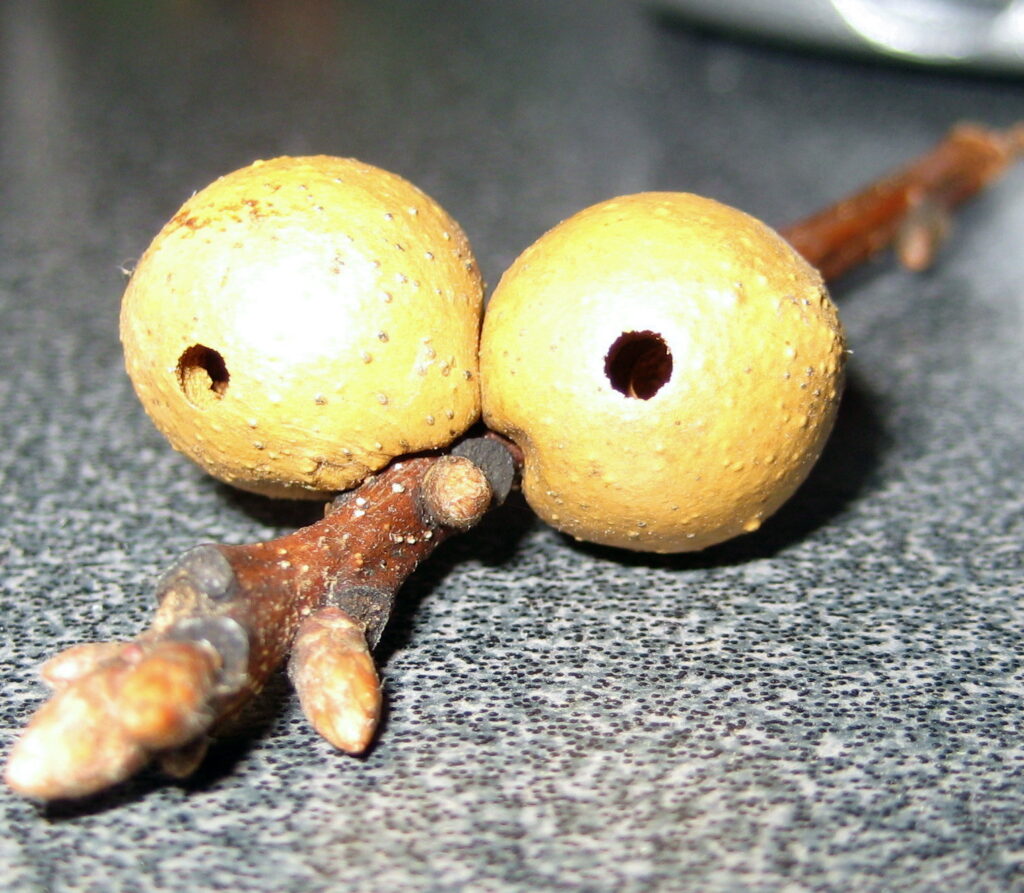
The California Gall Wasp is only 1/8″ to 1/4″ in size…far too small to probably ever be recognized or identified but we do know what their gall looks like. It is the big gall in the top image and you can clearly see the exit holes. Fascinating stuff.

Image Credit: Naturegirl 78 Flikr

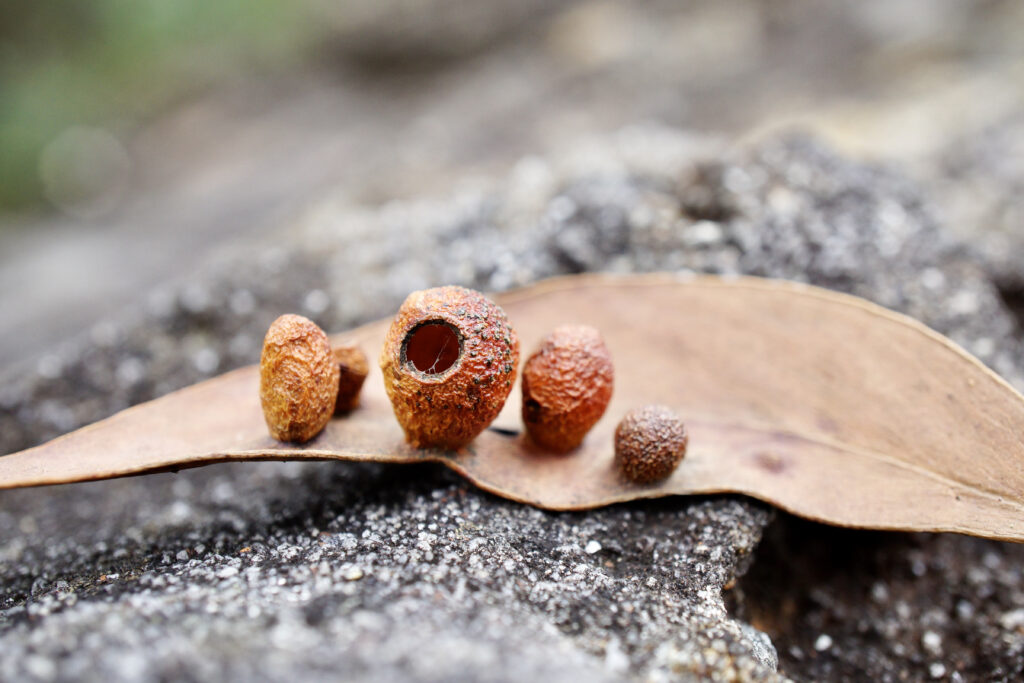
We took time to observe the smaller galls under our microscope. It truly is a completely different world under the lens of a microscope. Amazing…even a hand lens will open that world up.

Empty Galls Image Credit: Christine Lynch Flickr

There is so much to learn about this topic, reaching into insect study and tree study.

Posted on 2 Comments

OHC More Nature Study Book 2 – Quartz Study

Quartz samples

 “Quartz is the least destructible and is one of the most abundant materials in the crust of the earth as we know it. It is made up of two elements chemically united—the solid silicon and the gas oxygen.” Handbook of Nature Study  

More Nature Study Book #2
Rock Study – Quartz Crystals
Inside Preparation Work: 

  1. Read pages 754-755 in the Handbook of Nature Study (Lesson 213). This short lesson is packed with information and the lesson suggestions will give you some careful observation ideas.
  2. If you can locate some quartz samples to have on hand, do some close up observations of quartz. Even little ones can describe with words their quartz sample. Compare quartz with some other rocks in your collection.
  3. If you do not have samples, make sure to view the images of quartz with the additional links provided below.

Outdoor Hour Time:

  1. If the weather allows, take your outdoor time in a place that has rocks to pick up and handle. Be on the lookout for quartz crystals. Do not be discouraged if you can’t find quartz in your neighborhood but take the opportunity to observe and describe any rocks you see.
  2. Collect a few rocks to bring home and either start or add to your rock collection.

Rock observation 
Follow-Up Activity:

  1. After your Outdoor Hour time, take a few minutes to follow-up your outdoor time. Bring out your quartz samples and compare them to other rocks you may have collected. Set up a rock observation spot on your nature table. See the image above for ideas.
  2. Give time for a nature journal entry or ebook users can complete the quartz notebooking page and/or the coloring page to follow up this study.
  3. Advanced study: Research more about quartz on Geology.com. Use a printable Mineral Chart for additional information and identification. Learn the identifying marks of quartz. Record your information in your nature journal or a notebook page.

Additional Links: 

You can see how our family completed this challenge here in this post: 
Quartz Study – Rock Collecting Gone Crazy.

More Nature Study Winter Wonder

Ultimate Ebook Library @handbookofnaturestudy

Posted on 1 Comment

OHC More Nature Study Book 2 – Gall Dwelling Insects

More Nature Study Book #2 
Winter Insect Study – Gall Dwellers

“There are many forms of gall dwellings, and they may grow upon the root, branch, leaf, blossom, or fruit.”
Handbook of Nature Study, page 335

Inside Preparation Work:

  1. Read in the Handbook of Nature Study pages 335-337 (Lesson 39). Galls occur on a wide variety of plants, but the Handbook of Nature Study tells the story of galls on oaks, goldenrod, and the willow. The lesson also includes illustrations or images of actual galls and for this lesson it will be helpful for your children to know what to look for during their outdoor time. You can use this excellent visual resource to learn more what a variety of galls look like: Plant Galls. Interesting video of one kind of gall we have in California: Jumping Oak Galls.
  2. Other trees and plants to observe for galls: rose bush, hickory, hackberry, maple, spruce, or poplar trees.
  3. Refer to previous insect challenges: More Nature Study #2 Leaf-Miners or Winter Wednesday #7 Winter Insects.
  4. Supplemental Information: Discover Nature: Close to Home has a chapter on galls that is excellent for children.

Outdoor Hour Time: 

  1. Spend fifteen minutes outdoors with your children, looking for signs of gall insects. Look at this challenge as a sort of “gall hunt” and encourage your children to use their observations skills.
  2. Examine any galls you find. Use as many words as you can to describe the gall. (Ebook users: Some suggested words are found on the Gall Study notebook page.) Make sure to look for “exit holes”.
  3. Alternate activity: Look for any signs of insects in your backyard or neighborhood

Follow-Up Activity:

  1. Galls provide a way for certain insects to survive the winter. Use your follow-up time to have your children explain the life-cycle of the gall dweller or allow time for a nature journal to record their findings. Use the illustrations in the Handbook of Nature Study to help them draw a gall if possible.
  2. Advanced Study: The formal name for the study of galls is “cecidology”. Read this link: Gall-Making Insects. Summarize the information with words or drawings.
  3. Advanced Study: Record in your nature journal or on the ebook notebook page four different galls either from your outdoor experiences or from your research. Also, explain in your own words the life cycle of one of the gall insects featured on your notebook page (egg, gall forms, larva develops, adults, egg).
  4. Advanced Study: Sketch a gall dwelling insect from your area. Write an account of its specific life cycle on the journal page in the ebook or in your nature journal.

Join The Homeschool Nature Study membership Now

Outdoor Hour Challenge Winter Tree Silhouettes
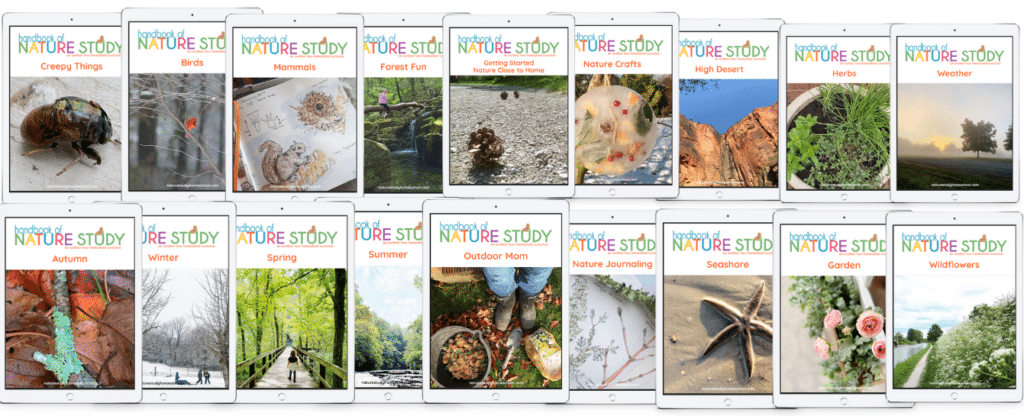
An image showing the full collection of Nature Study courses

Connect With Our Homeschool Community On Social Media

Did you enjoy this Outdoor Hour Challenge? Be sure to tag us on Instagram @outdoorhourchallenge and use the hashtag #outdoorhourchallenge so we can see and comment!

Posted on 2 Comments

Our Winter Weeds – A Continuing Nature Study

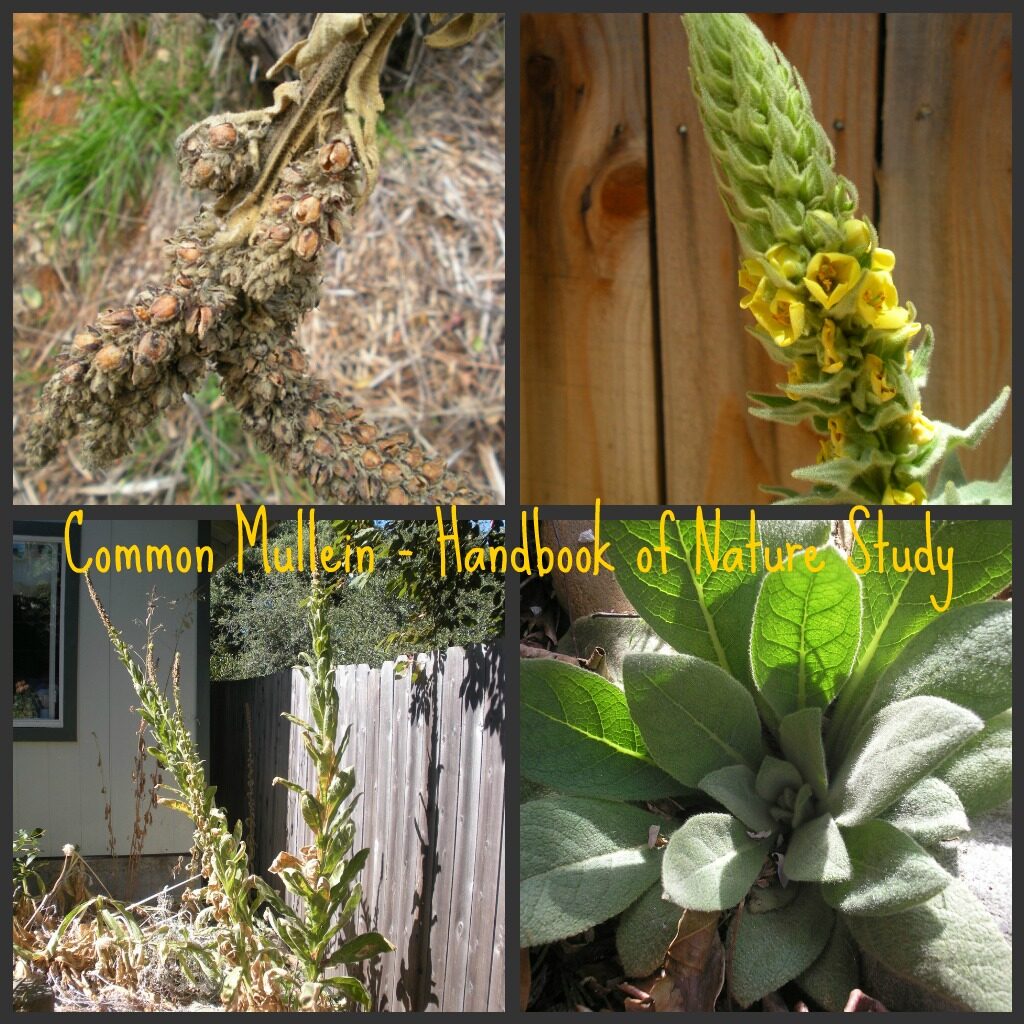
Mullein in Winter

Mullein and Winter Weeds

Winter weeds have become an on-going study for our family. Our winter hikes always seem to include some sort of weed observation.

So what did we do to study weeds a little more in depth this year?

    • We have been collecting weeds on just about every walk. They have made into bouquets, looked at under the microscope, and drawn in our nature journals.

Corn Lily Winter 2


  • We looked for weeds on our last snowshoe hike and made quite a few observations while adventuring in the snow.
  • We have been observing our “laboratory” of mullein in the garden as it has changed over the past six months. It isn’t very pretty at this point but we are going to leave it until the spring greening. There are still parts of the plant that are greenish so we figure some creature in the yard might find a use for it.
  • Mr. B did the additional mullein research suggested in the More Nature Study Book 2 challenge and then he completed a notebook page.


Winter Weed Collage
Weeds and seeds of all shapes and sizes.

I decided to sketch and record my weed observations in my nature journal. I am trying to get better at identifying winter weeds

Winter Weeds Study Journal 2
My mullein entry in progress

There is just so much to learn about winter weeds….it is like a whole new world to explore once you get started and train your eyes to see beyond the brownness of them. I spent two afternoons just looking closely, sketching, and researching in my field guide.

Winter Weeds Study Journal 1
My journal included some details of the weed seeds.

“The farmer and the gardener owe quite a debt of thanks to the birds that eat weed seeds. Of course there are still bountiful crops of weeds each year; but there would be even more weeds if it were not for the army of such seed-eating birds as sparrows, bobwhites, and doves.” Handbook of Nature Study, page 45

I was thinking about this link between weeds, seeds, and birds this week after reading this in the Handbook of Nature Study. The design in the food web is such an awesome thing that we could very well overlook the fingerprint of the Creator if we don’t take the time to learn more about it.

There is always something new to think about and learn from our nature study…even if we have been at it for many years.

Thanks for taking the journey with me.

Posted on Leave a comment

OHC More Nature Study Book 2 – Mullein and Winter Weeds

More Nature Study Book #3
Winter Weeds – Mullein Study

Inside Preparation:

  1. Read in the Handbook of Nature Study pages 537-539 (Lesson 146). Share a few facts and the images with your children so they can be on the lookout for mullein in your area. The distinctive rosette growth, the velvety leaves, and the flower stalk make this plant an easy one to spot, even in winter. (Ebook users have images included in the book and others can use the videos and the links in the Follow-Up section to view mullein.)
  2. Make sure to note that mullein is a biennial (takes two years to mature and produce seeds).
  3. Optional: Watch this short YouTube video that gives you an idea of what a winter mullein looks like: Common Mullein. I also made my own mullein video from my garden: Mullein in Autumn.

Outdoor Hour Time:

  1. Common mullein is found throughout the United States and Canada. During your outdoor time this week, try to find some common mullein to observe in its winter state. First year mullein will be look like green, soft, rosettes. Second year mullein will be the brown plant with the flower stalk. Observe how the leaves grow out between the two of the lower circle, that the upper leaves are smaller than those below, and that the upper leaves do not lie flat.
  2. Observe the mullein plant, looking at ways it survives the winter cold, rain, and snow. Make note of the plant’s location and plan to revisit it over the next year in each season.
  3. Alternate winter weed activity: Find and observe any winter weed in your neighborhood. Even if you have snow, see if you can find a part of a plant sticking up out of the snow and make some observations. You may want to click over and read my Winter Weeds challenge for additional ideas for your family.

Follow-Up Activities:

  1. Complete a follow-up nature journal entry or notebook page for your mullein observations. Ebook users choose from the Common Mullein or Winter Weed notebook pages.
  2. Advanced follow-up: Research the mullein plant online and find how it is used its traditional, medicinal, and health uses. Try this LINK or this LINK (this one is excellent!). Ebook users: Complete a notebook page.
  3. Advanced follow-up: Research annual, perennial, and biennial plants on Wikipedia. Ebook users: Complete the notebook page with a summary of the information and give examples of each kind of plant.

You can view our winter weeds study here: Winter Weeds – On-going Study

Posted on 3 Comments

Winter Twigs – Noticing the Details, Training Our Eyes

Twig Study Notebook Page
Notebook Page from More Nature Study Book #2

This was the study I was most interested in when I wrote the new More Nature Study ebook. It truly is something we have never studied before and I was interested to see what we would learn.

We chose three of our backyard trees to collect twigs from: sweet gum, white birch, and pear. Later we added a twig from our silver maple and a few branches from our forsythia bushes. All week I have been enjoying just looking at them in the vases…still not taking the time to do the study.

Well, the time finally came to actually do the formal study after we had done lots of casual observations. We pulled out the new ebook, printed off the notebook pages, gathered our tree field guide, and fired up the internet. I love doing nature study with older kids since they can ask and then answer many of their own questions with the tools we have at our disposal.

Here are some of our observations:

1. Mr. A cut the twigs with his knife so we could observe the shape of the pith inside. They were all round inside.
2. Each of the twigs had different shaped terminal buds, with completely different colors.
3. We have never noticed the leaf scars before and now we know what to look for.
4. The lenticels on each twig were very different. Now we can use this observation to identify a tree since we know what we are looking for.

Twig Study and Notebook Pages
Stay Tuned for a Bud Study in the new Spring Ebook 3/5/12

This study has brought into focus once again the design of each living thing around us. Who would have thought that you could identify a tree by looking at its twigs and buds? I enjoyed getting to know how to use a new tool with the Winter Tree Finder guide. All of us are going to look at twigs with a new eye now and some new vocabulary as well. This study would be a perfect supplement to a high school biology course.

If you are looking for more winter tree study ideas, you can click over to Winter Series Challenge #2.


Buds 1 30 12
We were sitting outside in the warm afternoon sunshine and noticed that the silver maple has burst open its buds. We then noticed that there were probably a hundred bees buzzing in the top of the tree. Is it early for the bees to be so busy in the trees? I’m not sure. This is where a nature journal record is valuable. Stay tuned next week for a free printable to keep track of your seasonal “firsts”.

Posted on 3 Comments

OHC More Nature Study Book 2 – Sheep/Wool

Wool roving - Sheep

More Nature Study Book 2
Sheep and Wool Study

Inside Preparation Work: 
1. Read pages 270-274 in the Handbook of Nature Study (Lesson 66). Since most of us do not have access to a real sheep to study up close, use this information as preparation for any future encounters with sheep. For this challenge you can spend time learning about how man uses the sheep’s wool to make fabric. Make sure to have at least one item made of wool for the children to observe (or a ball of wool yarn will work as well).
2. View these videos on YouTube.com: Sheep Dogs in Training and How It Is Made-Wool.

Outdoor Hour Time: 
If you have the ability to observe a real sheep and make direct observations, this is the best way to learn about sheep. If you don’t have access to sheep, there are several alternative ideas.
1. Take a walk outdoors wearing a wool hat, sweater, mittens, coat, or scarf. Enjoy the warmth and be grateful for sheep.
2. Observe another mammal and compare it to the sheep: size, fur/hair/wool, feet, teeth, eyes, tail.

Follow-Up Activity: 
1. Spend a few minutes after your outdoor time to review your experience. If you found anything of interest, make sure to talk about it and look up any additional information in the Handbook of Nature Study or at your next library visit.
2. View wool and hair with a hand lens. You can sketch what you see in your nature journal or on the back of the sheep notebook page. Ebook users: Complete the sheep notebook page with information from the Handbook of Nature Study.

3. Advanced study: The Handbook of Nature Study suggests writing about the method by which wool is made into cloth. Research at the library or on the internet and then give a summary.
4. Advanced study: Research the Artiodactyla order and Bovidae family of mammals (links below). Use resources from your public library or the internet.

Additional Links: 

You can see our family study here: Wool Study. 

More Nature Study Winter Wonder

Ultimate Ebook Library @handbookofnaturestudy

Posted on 5 Comments

OHC More Nature Study Book 2 – Twigs

Twigs in a Vase - Beginning our Twig Study

“Many times children are familiar with trees in spring, summer, and autumn but they have no knowledge of them in winter; yet trees in winter give much delight to those who know them as they do in summer. Oftentimes I have gone out on a winter day with my botany can and filled it with twigs for the pleasure that the colors and form gave me.
Home Nature-Study Course, Cornell University 1906

More Nature Study Book #2
Winter Tree Study – Twigs


Inside Preparation Work: 
1. Read the Tree Study section staring on page 623 in the Handbook of Nature Study (Lesson 172). Pay special attention to #3 in the section on Winter Work. Take note of the lesson’s observation suggestions to keep during your nature study of winter twigs. You may wish to read the links in the follow-up activity and the additional links listed below before you go outdoors so you will be equipped with some vocabulary to use casually during your observations.
2. Optional reading if you have access to a willow tree: Read Lesson 179 in the Handbook of Nature Study (starting on page 654). Use the ideas in the lesson to study willow twigs and buds.

Marking our Twig for Twig Study
Advanced Study Option

Outdoor Hour Time: 
1. Outdoor time this week should include a few minutes gathering twigs. Select twigs from three different trees to take indoors for closer observation. It would be helpful to know the names of the trees you collect your twigs from but not necessary. We came inside and marked each twig with little name tags This is primarily a challenge about comparing and contrasting twigs from various trees.
2. Advanced activity: Tie a string on a twig attached to a tree. Observe and record in your nature journal the twig’s changes for a few months.

Follow-Up Activity:
1. Use the questions from Lesson 172 to get your child started making observations for each of the three twigs you collected (or just one twig for younger children). Make sure to use your sense of sight, smell, and touch to make careful observations. Record your thoughts in your nature journal or on the notebook page (ebook users only).
2. Place your three twigs on a table. How are they different? Look at size, shape, arrangement of the buds, as well as the size or shape of the buds. Compare two buds on the same twig. Can you see the leaf scars where the leaf dropped off?
3. The main parts of the twig in winter are the buds, leaf scars, and lenticels. Sketch your twigs in your nature journal or on the notebook page, drawing everything you see and labeling the parts neatly.
4. Advanced follow-up: Complete the Twig Study notebook page (ebook users). Dissect a bud from your twig and then record your observations.

Additional Websites: 

Structure of a twig

You can view our twig study here: Winter Twigs – Training Our Eyes.

More Nature Study Winter Wonder

Ultimate Ebook Library @handbookofnaturestudy