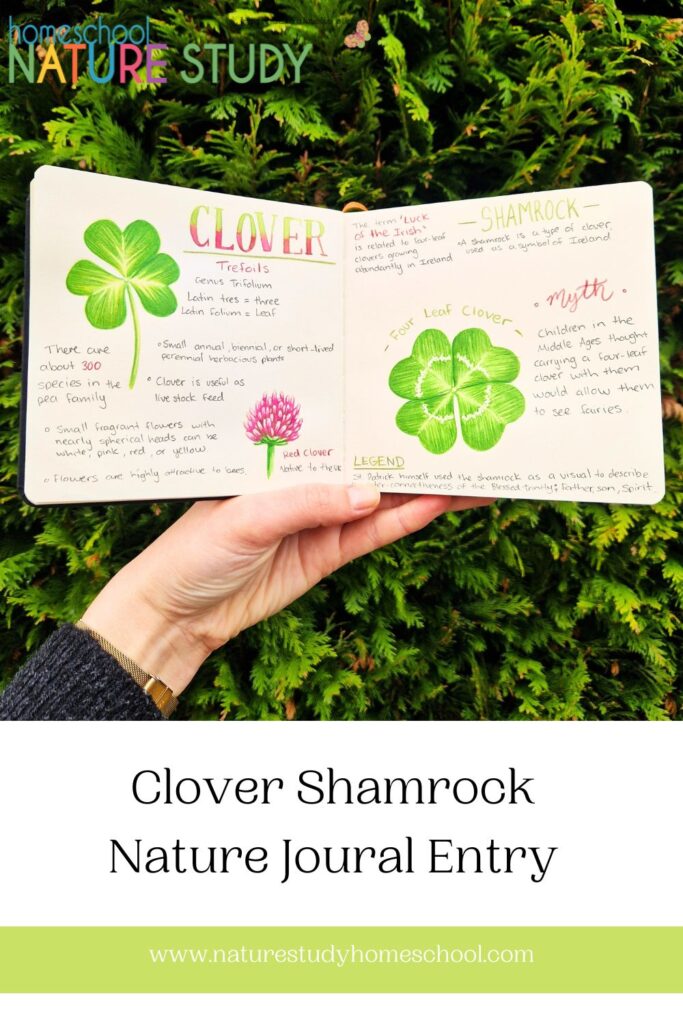
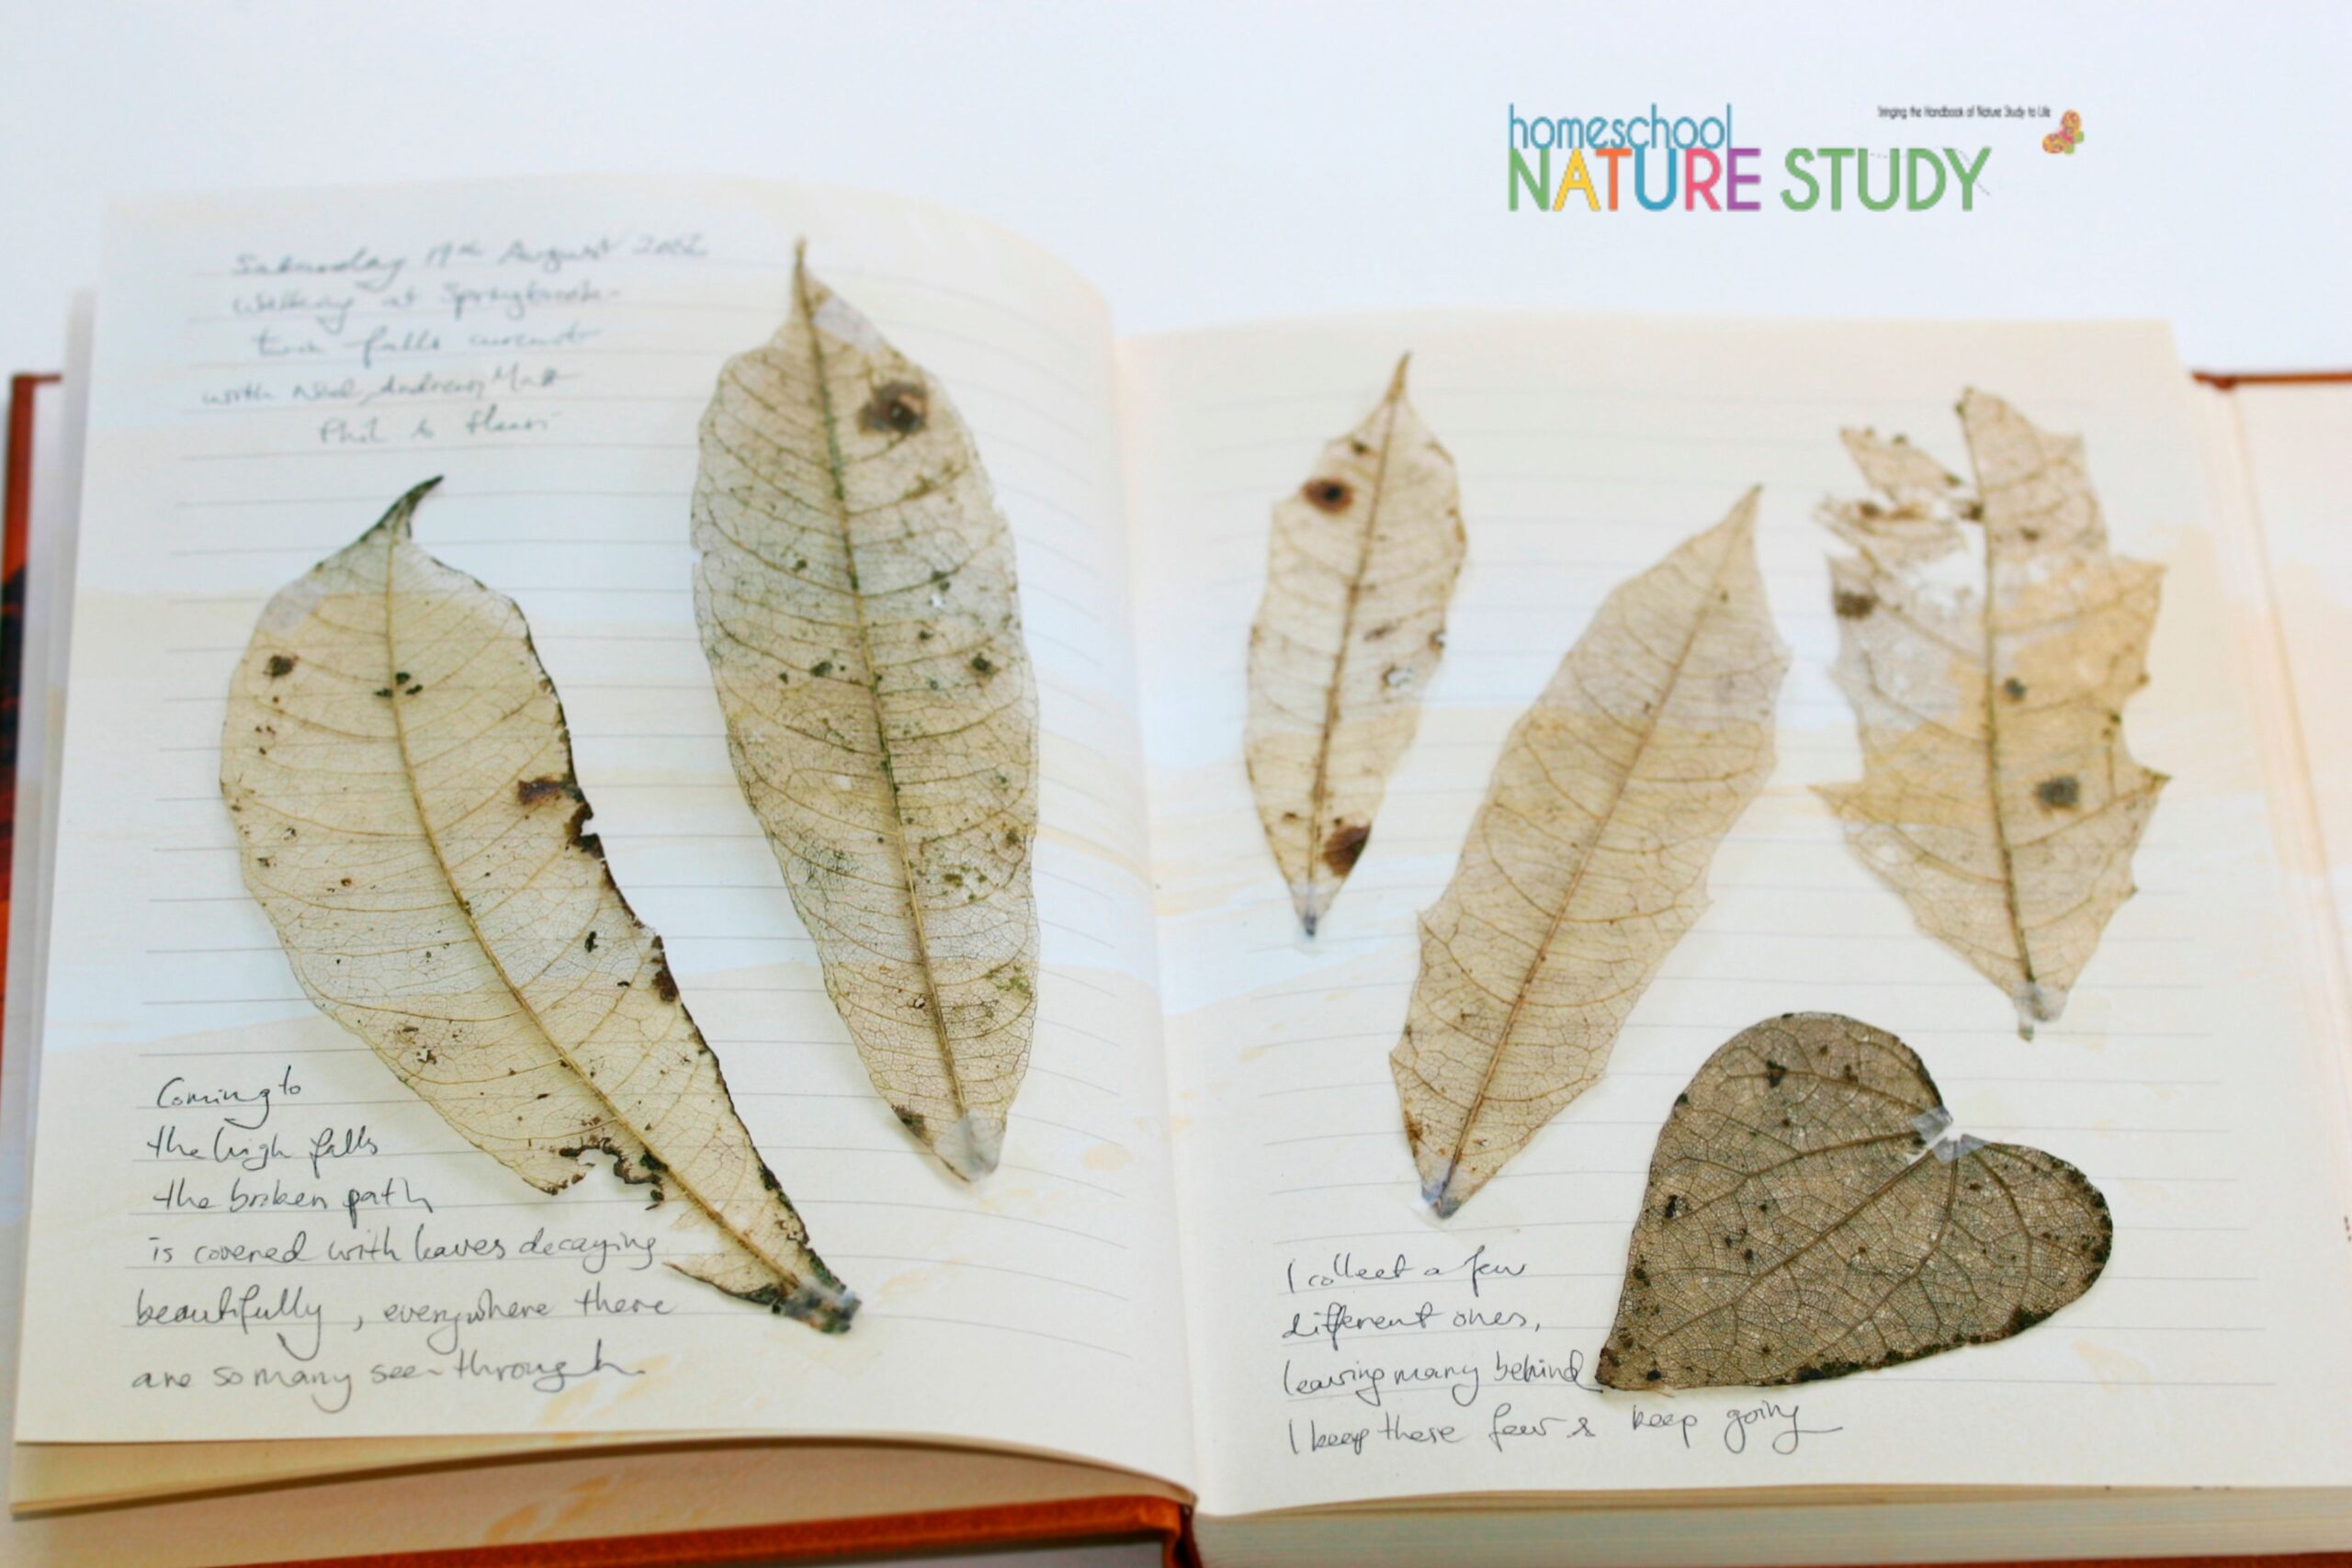
Creating a Nature Study Journal is a beautiful opportunity to document all the wonderful things your student has learned. Especially when a student adds their own creative touches to their journal. If it’s fun lettering, doodles, sketching, or coloring in images, etc. Adding a creative touch not only enhances a science class, but includes an art lesson as well! Try this helpful Watercolor Pencil Tutorial to add some pop to your next entry.
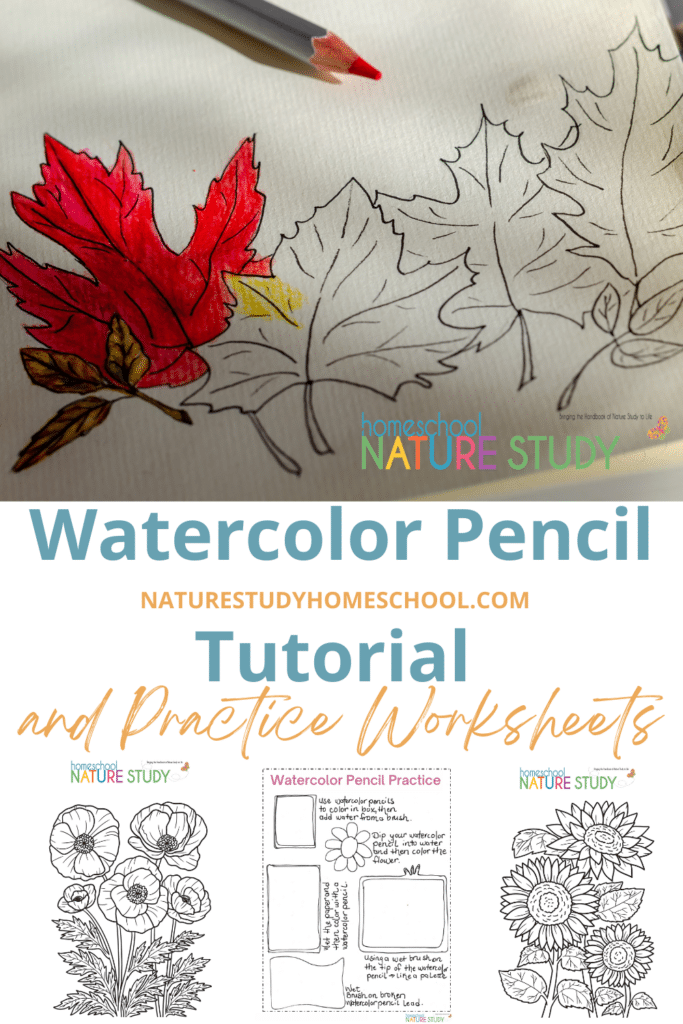
Watercolor Pencil Tutorial
Color and then brush with a wet brush:
Use your watercolor pencil to fill in a space, then add water. You can use your pencils to blend and layer a color before or after adding water. I especially like to use this technique in my nature journal because I can do my sketching in the field and then add the water later.
Dip the watercolor pencil in water first:
Dip the tip of your pencil in water and then use it to fill in your sketch.This is a nice technique for sketching in the field since you don’t need to take along any paint brushes. You don’t even need to carry water with you if you have a source in the field like a lake or stream.
Wet the paper first:
Try wetting your paper first and then adding your watercolor pencil. This works well for filling in larger areas of your sketch like the sky. Just remember that if you are working directly in your nature journal that this technique may warp your paper when it dries.
Use a wet brush on the pencil tip:
Use the tip of your watercolor pencil like a paint palette by brushing it with a wet paint brush.
Wet brush on broken watercolor pencil pigment:
Collect all those broken tips and use them as a sort of paint palette by stroking with a wet paint brush. Use this technique if you break off a tip when sketching in the field and you don’t have a pencil sharpener to make another point on your watercolor pencil.
Pencil Practice
Once you are comfortable using watercolor pencils, encourage students to add their artistic style to all the pages in their Nature Study Journal. Remember that watercoloring on printer paper is different than using watercolor paper. Try both and have fun!
Coloring Pages
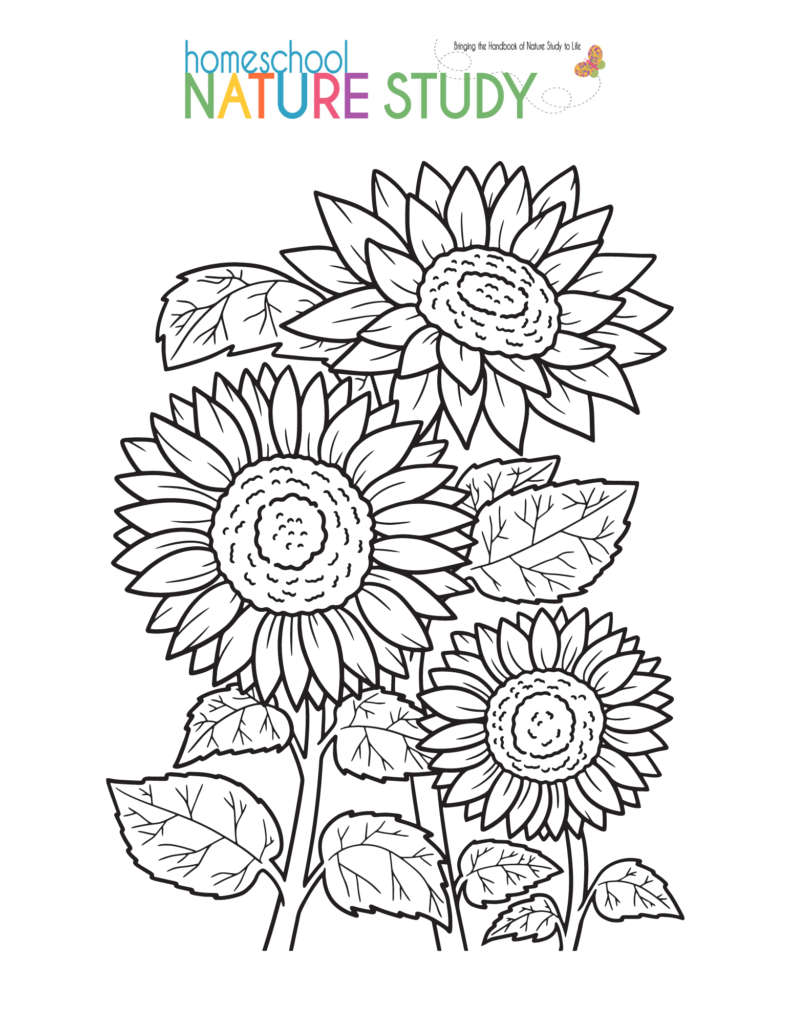
If your student is not comfortable drawing on blank paper, practice using watercolor pencils on themed coloring pages. Homeschool Nature Study Members can print our Nature Journal Flowers Coloring Pack (this includes 5 different types flowers) from their dashboard. Be sure to color and tape or glue inside your Sunflower, Lupine, or Simple Ideas for Wildflowers Nature Study notes.
Or print these lovely Bird Themed Coloring Pages at Your Best Homeschool to practice with watercolor pencils! What fun to color in these cute birds with unique designs, honestly – they are perfect for any age, so mom print one for yourself!
Become a Member!
Not yet a Member?! Spring has sprung and it’s the perfect time to incorporate Nature Study into your homeschool. We offer many tips, ideas, nature studies, worksheets & helpful downloads, plus encouragement along the way! Homeschool Nature Study is perfect for preschoolers, elementary, middle schoolers, and high schoolers! Yes – we believe Homeschool Nature Study works for ALL AGES. Join the community!
-by Barbara McCoy with updated resources by Stef Layton.


.JPG)
.JPG)
.JPG)
.JPG)
.JPG)


