Quartz is a common rock found in my part of the world. We see it just about everywhere we go whether it is on our walking trail or down by the river. We mostly have milky quartz.
Here is my specimen gathered locally and now sitting in my collection. Okay, I already had lots of quartz in my collection but since my nature study goals were to collect the samples this year, I decided to get another one…you can never have too many rocks. 🙂
According to Wikipedia, milky quartz is the most commonly found type of quartz and can be found almost everywhere. I know we have found it a lot of places we have traveled. Even though it is very common, it is still beautiful and amazing to look at.
Some more interesting facts I learned this time:
All granite has quartz and feldspar crystals in it. The crystals in granite are not large and perfect.
Amethysts are crystals of quartz colored a beautiful violet by the presence of a tiny amount of manganese.
Another interesting aspect of our quartz study was the knowledge that our local gold mines were commonly quartz gold mines. The gold was extracted using a series of stamp mills, mixed with water, and then extracted using mercury. I have seen the stamp mill replica in our town and was told that when it was in operation the noise echoed all over the town. I can only imagine how that would have sounded!
If you are interested in studying more about quartz using the Handbook of Nature Study, don’t miss this challenge from the archives: Quartz Study
To refresh your memory, I am going to try to collect all fifteen rocks discussed in the Rocks, Fossils and Arrowheads (Take-Along Guides).This month we spent lots of time out and about looking at rocks, collecting a few new ones, and enjoying our rock adventures. We did not actually complete any of the fifteen rocks from the book. I can see now that I need to be more purposeful if I am going to achieve this goal in the year 2013.
The affiliate links in this post are to things I own and highly recommend.
During our last trip to Yosemite National Park, we made a stop on the way there at Mono Lake. There at the Visitor Center they have a display of local rocks right out in front of the building. There were three large specimens to really look at closely and two of them are on my list of rocks from my nature study goals.
As a side note: This is an awesome Visitor Center and it does a lot of things right in my opinion. There is an interesting display of natural as well as cultural items. They have a video that they play that gives you a great sense of just how special a place Mono Lake is in so many way. It is also a fantastic birding spot! If you happen to find yourself on the east side of the Sierra Nevada, don’t miss this stop at the eastern entrance to Yosemite National Park.
Rhyolite is a volcanic rock that can be pale gray, pink, or yellow. The chunk they had at the Visitor Center was reddish with gray and black.
In this area there is a large rhyolite dome that we are anxious to go back and see up close. We were unable to collect a rock here so the photos will have to make due for this time around. I did look in the gift shop for a rock to purchase but they didn’t have anything but a small collection of rocks for the Sierra Nevada….which I bought and am enjoying a lot.
Interesting facts
(which makes sense now that I have done some reading)
The glassy rhyolites include obsidian, pitchstone, perlite, and pumice.
Obsidian is the pure volcanic glass formed from rhyolite
Pumice a volcanic rhyolite glass that has cooled in the form of bubbles.
We are planning on going back to this area again and exploring the differences between rhyolite, obsidian, and pumice. The specimen above is a large hunk of obsidian found at the Visitor Center.
Now that I know the relationship between these three kinds of rocks it makes it much more interesting.
The photo above shows obsidian on the top and rhyolite on the bottom with a very different texture. The photo was taken at Panum Crater which is near Mono Lake.
So even though we didn’t actually collect a samples this time, we feel like we can check this rock off the list. We are continuing to work our way through the Rocks, Fossils, and Arrowheads book.
Yosemite National Park in the summertime is an outdoor adventureland. There is so much to do! This trip was very different from our usual summer trips because it ended up only being my husband and I that were able to go. It is a far different experience to have just the two of us as opposed to having all six of us hiking around the Sierra. Both of us love this place so spending time together here is a pleasure and a delight.
There was a large wildfire further south from Yosemite but the smoke laid thick all three days of our trip. It was worse in the mornings but afternoon breezes swept some of it away. Yosemite Falls was dry! The park rangers were calling it “Yosemite Wall” instead. I am so glad that we had visited last May and enjoyed the cooling mists of the waterfalls then and for this trip it changed the focus from the valley to the surrounding areas of Tioga Road and Glacier Point.
We came into the park from the Tioga Pass side (east) and stopped just inside the gates to hike up to Gaylor Lake. This new to us hike (part of my nature study goals for 2013) was at a high elevation which always adds an element of breathlessness as you climb the trail. This is the view back down the trail…we listened to thunder and watched the clouds closely to make sure we would not be caught in a thunderstorm.
The landscape was green and there were quite a few wildflowers to enjoy from my resting spot along the trail. There were few other hikers on the trail which makes it seem as if you own the place as you hike along. We did see a man hiking back from the lake with a sack full of fish he had caught.
The trail crests and you look down over a beautiful basin where Gaylor Lakes have formed. I was still a little nervous about the thunderstorm but it seemed to be moving off in another direction.
Here at the top of the trail the trees are growing slanted and I can imagine how the wind must howl over the top of the mountain in the winter.
This is the Middle Gaylor Lake and on this day we didn’t go any farther. We sat for a long time enjoying the view before heading back to the car and on down Tioga Road.
We stopped along the way and took a quick hike over to Lukens Lake to see if there were any wildflowers but the conditions are much like you would find in mid-September and there were no wildflowers at all. It was still a nice hike and we did see lots of Bluet dragonflies along the edge of the lake.
The next day we decided to hike up at Glacier Point, taking the Panorama Trail as far as Illilouette Falls and then back. What were we thinking? We have done this hike before and it is a killer! The sign at the trailhead says two miles one way but both of us registered 3.5 miles on our Fitbits. That wouldn’t be bad but it is a steep, steep hike back up that 3.5 miles and in the hot sun exposed for most of the way. Guess what? It was worth the effort!
Along the trail we saw this wasp nest in a decaying tree. The insects were flying in and out but I got just close enough to take a good photo.
Here is a view of the whole tree and nest. The nest is quite beautiful and amazing to see…we were wondering how long it took to build this work of art.
Here is my victory shot after making it to the top of Illilouette Falls. The bridge behind me is just back from where the falls spill over the edge and down a 340 foot drop. We stayed on the upside of the falls for a long time just enjoying the beauty with our eyes and ears.
I sat on the top of a rock where the water was running down and swirling into the pool below. I was a little sad that my kids weren’t there this time to jump in or dangle bare feet in the cold water. My boys have even slid down the rocks here like a big slide into a deep pool where there are fish swimming in the crystal clear water. Great memories.
That evening we walked through the meadows in Yosemite Valley which is my favorite time of day to view the granite walls. The golden sunlight makes them come alive and the cooling air is filled with the sounds of the twilight creatures like crickets. Later that night we sat and watched the bats dart overhead. There is just so much to take in…
Here is another sunset visitor to Cook’s Meadow.
Early in the morning the smoke was filtering the sunlight and obscuring an otherwise glorious view of Half Dome from Tunnel View Turn Out.
Our last day we rented bikes from Curry Village and took off to explore the bike trails. The path is nearly flat or at least a gentle up and down so going is easy. This is such a wonderful way to explore Yosemite Valley away from the crowds and hustle of the popular areas. We had a nice pedal around the whole loop which includes several bridges over the Merced River where you can stop to take a break.
I of course stop to take a few photos of wildflowers. The goldenrod was so brilliantly yellow pretty.
This was something new to me…yet to be identified so if you have any suggestions they would be greatly appreciated.
So there ends another glorious trip to Yosemite, the second in my goal to visit every season. We have a camping trip planned for late September and I am already looking forward to that time in a season of changes.
These topics I will be adding to my nature journal and hopefully sharing here on the blog as part of my nature study goals:
1. Mountain chickadee
2. Rhyolite
3. Obsidian
4. Chinquapin (shrub)
5. Unidentified shrub with berries the squirrels were eating
We all were aching to get on the road and start our week long camping trip in Oregon. Part of the joy of driving to Oregon are the views along the Northern California and Southern Oregon Coast. Amazing! The photo above is between Arcata and Crescent City along a stretch of the coast that at this time of year is ablaze with lupine…the fragrance is divine as you walk through the vegetation to the sandy beach.
When the boys get out onto to the sand for the first time it is pure joy! They stretch their legs after a long car ride and enjoy the Northern California wide open sandy beaches. We walked a long way, looking for beach treasures as we went. Then it was back into the car for the last leg of the trip over the California/Oregon border and up to Brookings and our beloved Harris Beach.
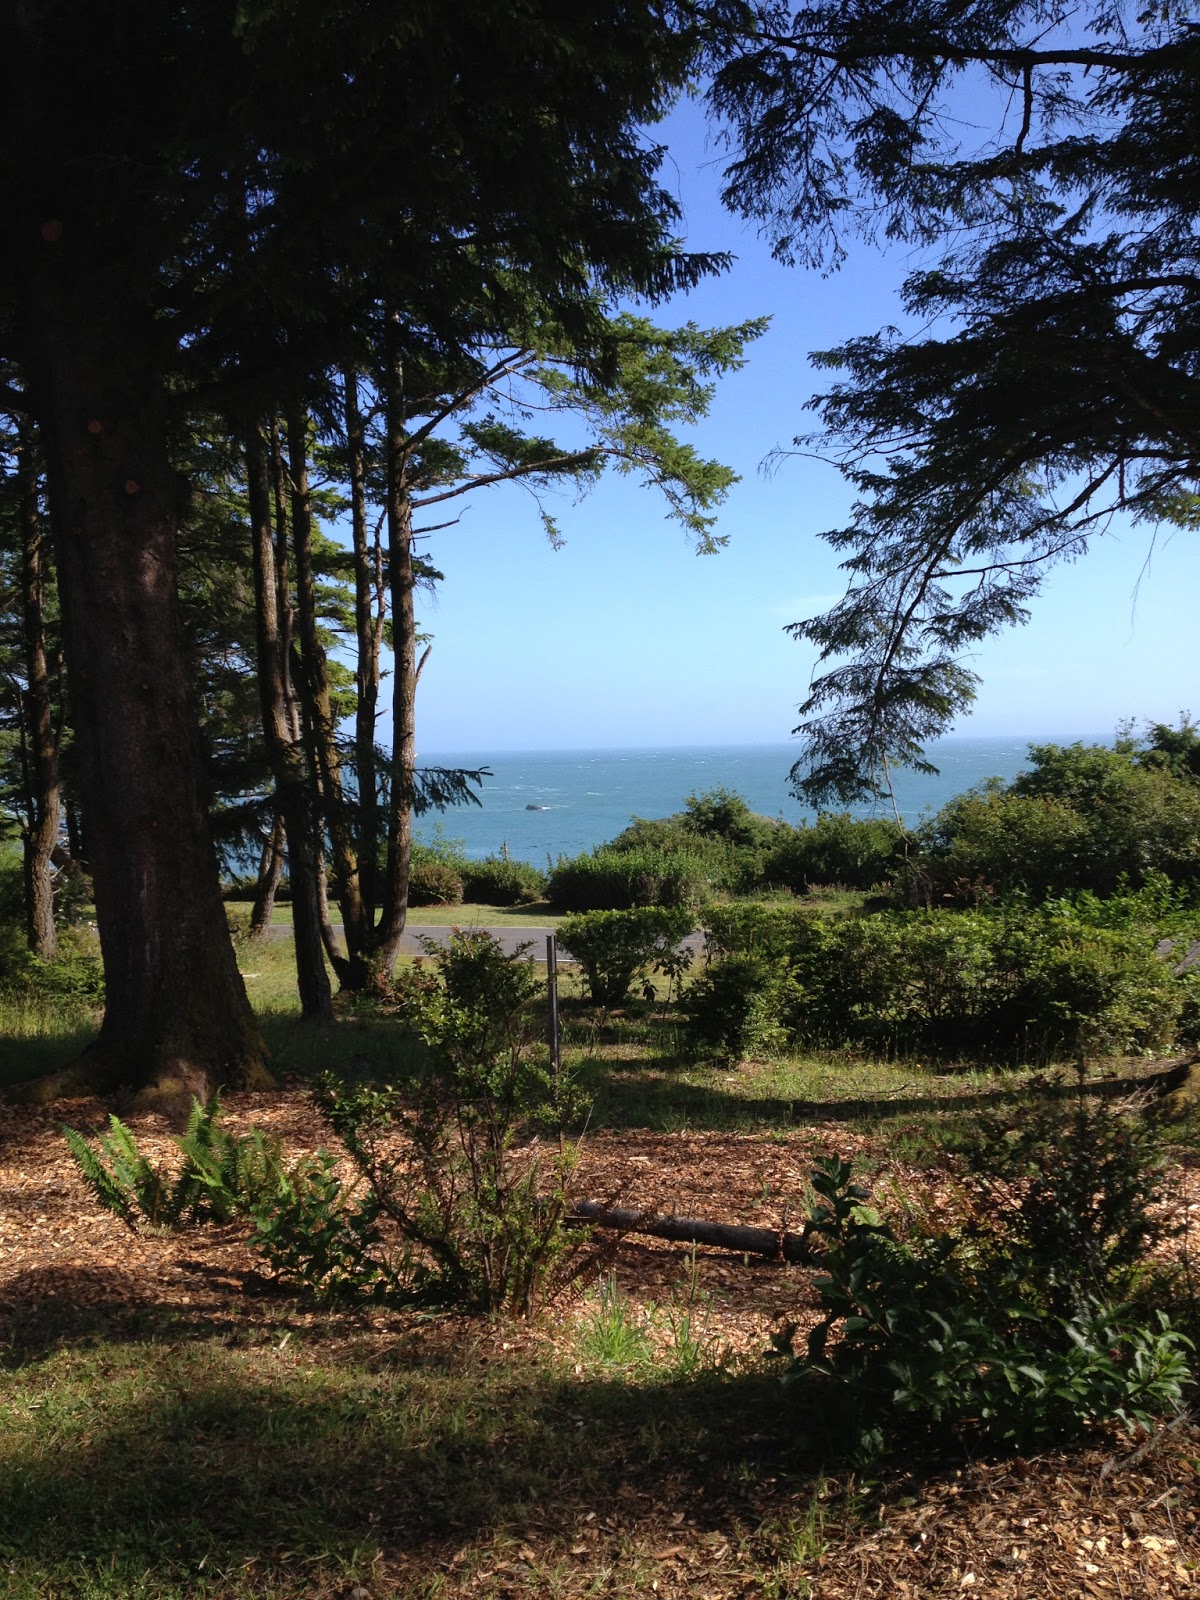
Yes! This is our campsite this year which overlooks the Pacific Ocean…looking westward and perfect for watching the sun go down each day. We were surprised at how light it was late into the evening…sunset was about 9 PM each day but it was light much longer than that.
Two of the days we were there we were able to take advantage of the negative tide and do some serious tidepooling.
Lots and lots of anemones to be seen…large and small!
Look carefully in this image and you can see the sea star’s “feet” that are clinging to the rocks at low tide. There were so many sea stars of many colors, sizes, and types. I love being able to see up close all the things we learned about from books.
I brought along a Stomp Rocket for the family to use on the beach. This was a fabulous idea and the boys (and mom and dad) each had turns stomping the rocket and watching it propel off down the beach.
We spent many, many hours walking the beaches and collecting colorful rocks…sometimes my pockets were all filled to capacity. I enjoyed sorting my rocks by colors on the picnic table at the campsite. I left them out each night and in the morning the dew would make them shiny and shimmery again.
These were my favorites…the red, green, and gray ones.
I also like this colorful kind which sort of looks like wood. I have a couple more rock related entries to share with you next month as part of my nature study goals and collecting various kinds of rocks. This was a great way to keep nature study at the forefront of our trip..love a good goal.
Mr. A was my fellow photographer at the tidepools. He was willing to really get out where he might slip and get wet to capture some great images of his own. He uses his cell phone camera and they turn our really great.
Here is a shot of my other photography buddy…Mr. D. He is more of an artist with his camera and takes his time to get just the right shot with the right setting. His images are amazing. This was also the very first time that our Kona dog has gone camping with us. She settled right in and had a great time. The wonderful thing about Oregon is that dogs are allowed on the trails as long as they are on a leash. She was able to take every hike with us…love Oregon!
We spent two different days in the redwoods hiking in the quiet stillness. We pretty much had the place to ourselves and it was so very refreshing. I already miss it. I am checking off another new hike on my 2013 Nature Study Goals, two down and two to go!
Can you just imagine how far you can walk on this Oregon beach? It was a windy day but it wasn’t cold so we took advantage of the open space and just roamed for a very long time. (I collected a few rocks too.)
Hello Mr. Snail!
Oh wow! These ferns were amazing! I loved seeing the black stems and the graceful way the fronds grow.
Aren’t they just incredibly pretty? I knew that our California Maidenhair fern had a black stem so I though maybe they were related. I looked it up when we got home and sure enough! This is the Northern Maidenhair fern.
On our last day we visited Crissey Field State Park which has a wonderful visitors center. We spent some time viewing all the nature displays and gathered some pamphlets for future use. We had a picnic lunch and then adventured out to the beach which is so very beautiful. Driftwood, dune plants and flowers, and a nice sandy beach are just what we needed to end our trip on a high note.
We were so happy that our trip turned out with gorgeous sunny skies for the majority of the week. We were able to do a lot of hiking, a lot of exploring, and enjoyed each other’s company while visiting the Southern Oregon Coast.
Until next time….
Have you seen the new product over at NotebookingPages.com? If you own a Lifetime Membership over on Debra’s website, you can log into your account on NotebookingPages.com and download your set right now. If you aren’t already a member over there, you can purchase the set separately or I would highly recommend a Lifetime Membership so you can access all of the 1000’s of notebooking pages she has to offer. ($4.95 for the setor get started with your membership with $10!)
Please note I am an affiliate for NotebookingPages.com and have used the notebooking pages with my family for years!
This month we made sure to observe carefully the granite rocks in Yosemite National Park. We didn’t collect any because that isn’t allowed in a national park but we did learn a little more about the granites found there with a trip to the Visitor’s Center. They have a fabulous display of granites, showing the rock cycle and the way this particular granite was formed.
Everywhere you go in the park you are surrounded by granite! Granite of all shapes and sizes lines the trails and creates the majestic valley walls you see all around you. The biggest piece of granite that looms over you in the valley would be El Capitan.It is a rock climber’s heaven and we read in the Visitor’s Center that the granite that makes up El Capitan was cooled slowly which makes it particularly strong and resistant to erosion. We watched the climbers up there on the nearly 3,600 foot granite face…amazing courage to be up there!
The exhibit has many interesting facts about the granites of Yosemite National Park.
There were also samples of the different granites from different areas of the part…each one with a little different combination of elements. Fascinating!
So even though we didn’t actually collect a sample from Yosemite, we have plenty of other granite samples from our travels locally. We are continuing to work our way through the Rocks, Fossils, and Arrowheads book.
We have high hopes of studying two rocks in June as we travel to Oregon. I know that if we didn’t make this project part of the nature study goals for 2013 we would have let it drop. But, I am determined to get as many done this year as possible.
Slate is a natural part of our landscape and it turns out after a little research that at the beginning of the 20th century, our county had one of the biggest slate mining trades in the whole United States. There are slate mines just a short way from our house and I never even knew it. I had seen the quarry but it did not occur to me that it was a slate mine. Turns out that on our side of the river they have started mining slate again.
Once upon a time they had an elaborate cable car system to get the slate from one side of the canyon to the other…I had heard about the cable crossings but I guess I never had put much thought into what they actually carried across on the cables. It wasn’t until this year’s rock challenges that I even put it all together.
One of the little mountain towns used to be called Slatington and it was called that because they made slate shingles. I never knew.
After last month’s study of shale, we were on the lookout for some samples of slate to collect. It didn’t take much effort since we now knew to look for the layers and then to test the rock’s hardness. If it broke easily, it was shale. If it was hard and wouldn’t easily break, it was slate.
We found this wonderful specimen on our regular hiking trail.
I think what was confusing me was that I thought that shale had to be black….turns out that is not the case. Our shale can be black, brown, reddish…or in between. It is the texture and fissure qualities that make slate easy to identify.
What a delightful addition to our nature table! Moss in a pot adds some color and texture to our little growing area of the nature table where we also have several varieties of cactus growing. The light seems just about right here for the moss and so far we have watered it once a week and it is still going strong.
The moss on the plate above was the specimen we brought inside to examine as part of the Moss Challenge from last week. We viewed it closely with our eyes, magnifying lens, and camera lens. There really is a lot to see and the parts of the moss are really interesting.
After viewing, I took a small pot and filled it with some regular garden soil and then placed our specimen on the top. I watered it well from the top and then pressed it firmly onto the soil. I did a little research and it said that moss really does like to be watered from the bottom so when I need to water it I place it in a small bowl of water and let it sit until the whole thing is moist.
Here are few images that we took with our camera…really showing the capsules and the stems.
Amazing structure and no wonder it is soft and enjoyable to the touch!
Our front yard is a great habitat for moss since we pulled out the lawn. The cracks in the pavers and the area below the retaining wall have moss that adds such a great feel to the yard. We did not plan on the moss but it just invited itself to grow in the cracks and crannies.
The big rocks in the foreground were bright green with moss a month or so ago but since we have had warmer temperatures and drier days the moss has turned sort of brown. I know with the next rain it will green up again so I will enjoy that when it happens. You can see our Lamb’s ear plant here in this image…one of my favorite low water plants in our front yard….I know it spreads but with the big rocks right there and the retaining wall behind, it can’t go too far.
So there you go…our continuing moss study! Don’t forget there is a free printable in the Moss and Lichen Challenge that you can use to record your own moss study.
How about your family? Have you found some moss to explore with all your senses?
Our local landscape is full of rocks…the area was settled by gold miners in the California Gold Rush and even today there are gold mines in our area that are back into production (the price of gold is up enough that they can make money). There is a park in our neighborhood that has an exposed bank next to the road and that is where we found our shale to study as part of my on-going year-long focus on rocks.
This is our official first rock from the list which we pulled from the book Rocks, Fossils and Arrowheads (Take-Along Guides).See last month’s entry for my preparation for this project where I will be attempted to locate and collect as many of the rocks from the book as possible during 2013: Rock Update.
This is what our local shale looks like….like wafers that are either horizontal or vertical. The color varies but mostly the out-croppings we have seen are light colored from a light gray or red or even green. Doing some research has revealed that it is the organic materials in the shale that give it its color: iron oxide, hematite, geothite, or mica.
This is the piece of shale that is shown sticking out in the photo above. I could just slide it out.
Shale is a sedimentary rock that is mostly composed of clay and is sometimes called mudstone. It can easily be scratched with a knife and has a quality that is listed as “laminated”. This means that the rock is made up of many thin layers.
The mystery rock from last month’s entry turns out to be slate which is the metamorphic form of shale. Guess what next month’s rock will be? You guessed….slate! I will explain how you can tell the difference because in the process of identifying the shale I also learned quite a bit about slate.
To refresh your memory, I am going to try to collect all fifteen rocks discussed in the Rocks, Fossils and Arrowheads (Take-Along Guides).This month we spent lots of time out and about looking at rocks, collecting a few new ones, and enjoying our rock adventures. We did not actually complete any of the fifteen rocks from the book. I can see now that I need to be more purposeful if I am going to achieve this goal in the year 2013.
That is the beauty of goals…they keep you focused and on track.
We did however accomplish several rock-related activities.
We added a new rock to our front yard rock spot. We have yet to identify it but that is going on February’s list because I actually think it is some kind of shale or slate which would be one of our fifteen rocks from the book.
We collected a rock from the other side of the river canyon and comparing it to the rocks on our side of the canyon, realized it is different. This I think is going to be the value in labeling our rocks with where we collected them.
My son, my husband, and I enjoyed a warm mid-winter afternoon sitting on a big rock at the river. I collected a few rocks for a friend as a surprise.
This was a month we spent more time outdoors looking at rocks and talking about rocks and not much was recorded in our nature journals. I already have my rock grid in my nature journal so I just need to sit down with a pen and record this month’s thoughts and discoveries.
I am going to do my best to have one of my official fifteen rocks studied by the end of February.
Next week I will update you on my “using less plastic” goal for 2013…which I did a much better job with this month!
Outdoor Hour Challenge: This week try to find at least one specific rock to collect and observe. If you need to, pick a rock from your collection and use that as your subject. Use your outdoor time to slow down and really look for rocks or if you have snow on the ground, try to remember where there are rocks in your neighborhood and plan for a future rock hunt when the weather is more agreeable.
You may wish to complete the granite or the quartz challenge that were previously posted here on the Handbook of Nature Study: Granite Study Quartz Study
You may pick any rock to study that you have on hand. There are several other rocks listed in the Table of Contents for the Handbook of Nature Study that you may wish to use in your study.
Printable Activity: Rock Observation Chart: Use this printable chart to examine several of your rocks carefully. This is a little more advanced activity using vocabulary that may be unfamiliar to you. The activity is meant to be a simplified exercise in learning how to use deductive reasoning to identify your rock sample.
Getting Started Suggestion:
If you already own the Getting Started ebook, complete Outdoor Hour Challenge #7.We are focusing on rocks this month so you can start your own rock field guide using the directions and notebook page in this challenge. You can record your observations from the printable activity above on your rock field guide card if you wish.

.JPG)


.JPG)
.JPG)
.JPG)
.JPG)
.JPG)
.JPG)
.JPG)


.JPG)
.JPG)
.JPG)
.JPG)
.JPG)
.JPG)
.JPG)
.JPG)
.JPG)
.JPG)
.JPG)
.JPG)

.JPG)
.JPG)


.JPG)
.JPG)
.JPG)
.JPG)


.JPG)


.JPG)


